Category Archives: Tutorials

DIY Natural Laundry Detergent

When converting our household to organic / chemical-free items, one of the first things I looked into was detergent. Mainly because both my husband and baby have sensitive skin. I have been using All Free & Clear up until recently for a couple reasons. It is Free and clear of harsh chemicals (baby approved) and it’s fairly inexpensive.

I had been trying to find a DIY detergent, but it can be overwhelming because there are so many different recipes. Sometimes the recipes have expensive ingredients or there are some that just aren’t that great. I found this recipe inspired originally by Christi at halfwaytoheavenhomestead. Check her out at https://www.instagram.com/halfwaytoheavenhomestead/ 

All of these items can be found at Walmart! The only one I had to order was the liquid Castile Soap.

This is my first week trying this detergent! I know it will be soft enough for baby’s skin, but will it be strong enough to clean cloth diapers?? I’ll let you know next week how it works!

Materials Needed:

Super Washing Soda

Baking Soda

Pure Castile Liquid Soap

Essential Oil

Ladle (for stirring and scooping)

2 Gallon Jar

Directions:

Start by pouring 1 cup of Washing Soda into your 2 gallon jar.

IMG_7593

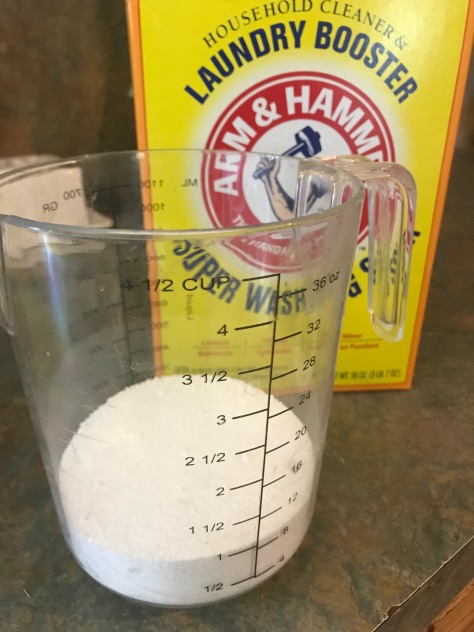
Put just enough water in the jar to cover the washing soda.

Then add 1 cup Baking Soda.

IMG_7594IMG_7595

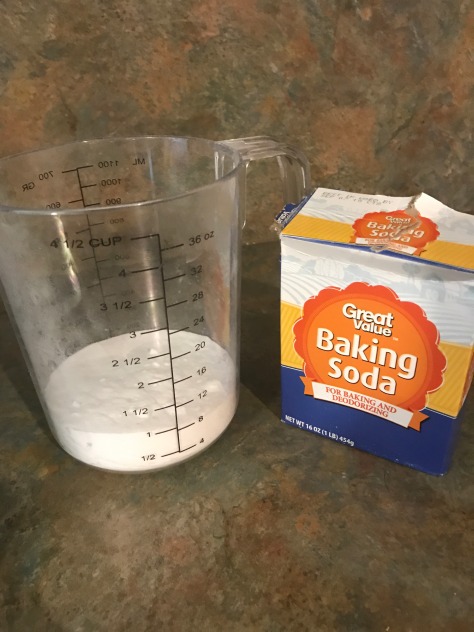
Completely fill the jar with water and stir. When I stirred, some of the washing soda stuck to the bottom. Using a wooden spoon to stir helped.

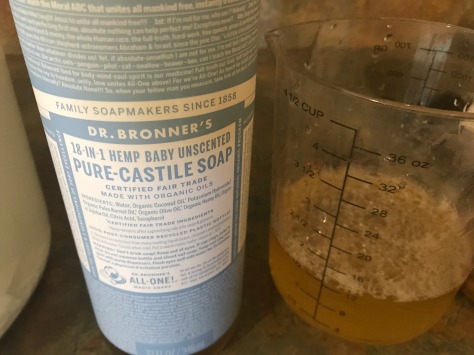
Add in 1 1/2 cups Pure Castile Soap.

IMG_7596

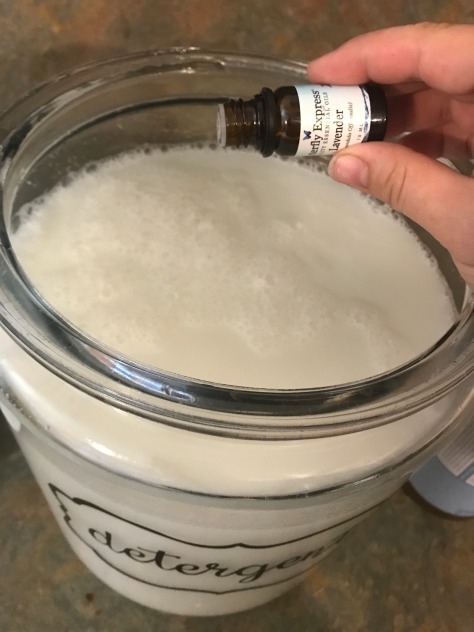
Add in 40 drops of your favorite essential oil. I used lavender because I love the smell and it’s safe for babies.

IMG_7597

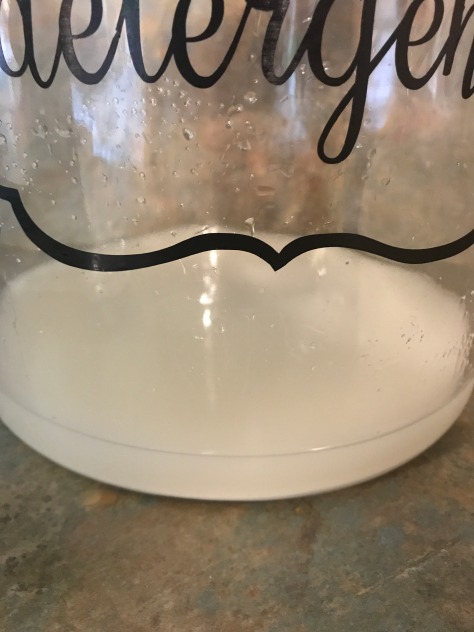
Stir everything together and it’s done!

Order these cute canister labels from Kendra’s Corner Market

I use 1/2 cup per regular size load.

Also note that it is normal for the liquid to separate. Just simply stir before scooping out your detergent.

Happy crafting friends!

DIY Chicken Nesting Boxes for $15

I am so excited that we finally got our chickens and ducks! Is it officially a little farm now?? Jason wanted a cowboy hat because he’s cute and thinks he’s a farm boy now so we both got new ones. It was fun! 

Anyways, because of building the fences and coop by ourselves we were a little exhausted from DIY projects. We looked for some nesting boxes at our local ranch store and found out that one, individual box was $14.99. HOLY CRAP! So back to DIY we went. Like, it wasn’t even made that well. It was plywood. And whenever I see something overpriced I always find a way to make it myself. So I’m doing this tutorial in hopes that someone else who doesn’t want to spend $15 a nesting box can make these as well. We ended up making 12 nesting boxes for $15.

First off, we headed to Lowe’s to get the plywood. I forgot to take a pic of the one we got, but it was almost $15 and maybe 1/8 inch thick. 4 x 8 feet. And that’s it! We already had the staples but if you need them we got the 3/8 inch Crown staples for our Compressed Staple Gun. 

MATERIALS YOU WILL NEED:

4 x 8 foot Plywood sheet

Staples and staple gun

Table saw/ Miter saw

At Lowe’s, we had a guy cut the plywood for us into 12 inch x 4 foot sections. That just made it easier on us. Then we sat down and thought about how many pieces we would need to cut. We would need several 12 x 2 inch pieces for the front and back. And also the dividing pieces. My hubby did the math on these, but it wouldn’t be too hard to figure out. I like to draw it out in my head. Since we need 12 nesting boxes, that’s 36 small pieces and 10 dividing pieces.

We left 3 of the 12 inch x 4 feet sections to use as the base.

Start by cutting a few of your sheets into 12 x 12 ‘s. These are eventually going to be your dividing pieces. Then cut your 12 x 2 ‘s.

You should have a pile that looks like this.

Then take those 12 x 12 ‘s and set your saw to a 45 degree angle. Then we measured 2 inches up from the base and cut there.

Yay! The cutting is over! We measured and marked the base pieces every 12 inches apart. Then chalked to make the stapling more accurate. Line up the dividing pieces to the base pieces every 12 inches and staple down the back

.

Do this to all the dividers and bases. Then you attach the 12 x 2 ‘s to the front and back. We did a top 12 x 2 every once in a while just for extra support.

That’s it! We didn’t put end pieces on this one because it was going right up to the sides of the coop. Next is the fun part – installing it to the coop!

the bottom of these are not very strong so you will need to rest them on something. We used 2 x 10 ‘s that we had on hand. We made little tables so they had legs on the ground. Then we attached them to the wall they were next to. After that, we laid the nesting boxes on and used the nail gun to attach to the bottom support and the back wall. And look how pretty they turned out!

Just make sure it is sturdy and low enough the chickens can get on. We thought about building a walk-way, but decided against it. The chickens can jump enough to get on. These are 19 inches off the ground. Add your bedding and you’re good to go!

I hope this tutorial helps someone out! It’s an easy build that is cost effective as well. I will be doing a full coop tour once it’s all painted and pretty! Thanks for reading friends!

Totally Awesome Burp Cloth Tutorial

Hey yall! So I’ve been making these burp cloths for a few months now and people have been asking for them so I thought I’d do my first ever little tutorial! They’re nothing fancy, but who wants anything nice to clean up spit with?! Anyways, they’re cute, they do the job and CHEAP! Burp cloths vary in price depending on brand and quality, but the average price I’ve found is about $10 for 5. With this tutorial, you can make at least 12 for about $6. I’m always looking for ways to get quality products for an affordable price and these cloths make that possible!

I get my fabric mostly from Walmart, but any place like Joann’s or Hobby Lobby that has cotton fabric will work just fine. You can try different materials, but I’ve found that cotton absorbs better than most and that absorbency increases after each wash. You’ll only need one yard of a front fabric and one yard of back fabric. So head out and find the cutest design you can find!!

I purchased one yard of a teal polka-dot (cotton) fabric from Walmart as well as a simple white (cotton) piece. It came to a total of $6.

Lay out one of your pieces (doesn’t matter which) on a flat surface with the good side faced TOWARD you. You want the “bad” side of the fabric on the outside when you sew.

26F7B654-96DC-437A-9070-C46E8E6B1959

Next, lay the other fabric on top and make sure to line up the edges. You don’t want to waste fabric! Get out as many wrinkles as you can.

0F28BEDA-0F1E-431D-995B-51C45553E8F9

With a tape measure and pencil, label 8 inches across and 16 inches high. Feel free to make your cloths bigger or smaller, but I feel like 8 x 16 is a good standard size. Keep those edges straight! You will only have to do this for your first piece. It will serve as a guide for the others should you choose to make more.

CB3E3826-1327-4BEE-B69B-D6DC1E5D8D92

C72B250E-DCE6-4AE7-BCB3-61D8F7A2B02D

Then start cutting! Try to get lines as straight as you can. Don’t worry if you make a mistake because you won’t be able to see this in the end product.

C72540B1-AE92-45C0-B0B9-E18224A5DBFF

You should have a rectangular piece like this! Good job! You can use some pins to keep fabric in place, but I usually just adjust it as I go. Totally up to you and your comfort level. Let’s head to the sewing machine!

B9F79CFC-CADC-46A3-838B-5BDD2E798947

Always start sewing on a LONG side. Go about 1/4 inch in and go to town! Don’t forget when you start to go forward a few stitches be sure to then do a short reverse stitch to seal the thread.

42D195F8-8A5C-4E6E-9455-CEA0A7FC7ED0

When you get to a corner, make sure the needle is up and lift the presser foot. Then rotate the material and keep going! Sew until you get to the last short side.

2F4E46AB-D419-4ECA-A14F-FF921A3736F6

Before finishing up the last short side, pull off the fabric completely from the machine and trim the thread from the cloth. I like to cut the corners because I think it makes the corners look better and less bulky.

8E64800B-63F9-4217-A1B3-4DA9C2357501

Reach your hand inside the opening and flip the cloth right side out.

DBC7AED4-CB64-48B1-8E3B-237275111C7E

Make sure you push all the corners out with a finger.

99B96B42-DF1A-4E13-9AC1-1ED875C34226

Fold in the part that is not yet sewn. Then just sew it shut. (This is why you want to end on the shorter side)

F9D2C86A-053D-4524-AAD5-EF191EE9C4C6

All done!! Congratulations you have a totally awesome, very standard, durable burp cloth 🙂

B9F784C9-7867-44FD-B26A-DBA15C61977D

P.S. if you want to make more, you would simply use the first cut as a guide and place it over the rest of the fabric and cut around it. Best of luck! Thanks for reading!

Did you try this project??

Leave your comments below.

6ACFAC0E-094D-4C25-AC4A-45D6D153097A