Category Archives: Recipes

Easy & Tasty Pancake Syrup

Have you ever read the ingredient label on traditional Syrup from the grocery store? HOLY SUGAR! Anytime you see high fructose corn syrup it is not something you want to ingest a whole lot of. While pure maple syrup is the best form of syrup, it’s not always practical because it is expensive. This syrup recipe I’ll share with you only takes 3 minutes and only a few ingredients. NO HIGH FRUCTOSE SYRUP, NO CELLULOSE, NO PRESERVATIVES, NO OTHER JUNK. Save yourself some money and make this easy and tasty syrup!

DIRECTIONS:

  1. Whisk together 1 Cup Water, 1 Cup white sugar, 1/2 Cup brown sugar and 2 Tbsp Butter in a sauce pan.
  2. Bring to boil and cook 3 – 4 minutes, stirring frequently. DO NOT OVERCOOK
  3. Remove from heat and add in 1 Tbsp. vanilla or maple flavoring / extract.

THAT’S IT!

Notes:

Syrup will thicken as it cools.

Store in sealed jar in refrigerator.

Throw syrup in microwave if the butter hardens.


Thank you for visiting!!!

-Kendra-

The BEST healthy-ISH chocolate chip cookies

You guys. I’ve done it. I’ve finally created the perfect chocolate chip cookie. And the directions are super easy! Now, it wasn’t done alone – I used tips from a few different family recipes and some trial and error.

I’m always looking for ways to sneak healthier options into my cooking and I was able to do that with these cookies!! I mean, there’s still healthier options out there for sure, but who wants that when it comes to cookies right??

I have inserted links if you’d like to see some of the exact ingredients I used.

Here it is!

INGREDIENTS:

1 Cup melted coconut oil or Butter

1 Cup brown sugar

1/2 cup organic pure cane sugar

2 tsp Vanilla Extract

1 tsp baking soda

1 1/2 tsp pink Himalayan salt

1 egg

2 1/4 cups Unbleached flour

1 1/2 cups ground oats

DIRECTIONS:

Mix all ingredients together.

Scoop with a scooper onto sheet.

Bake At 375 degrees for 7 minutes.

**HINT: the trick for getting any cookie just right is to remove it from the oven before it looks done. These cookies will turn slightly brown when you should take them out. **


HAPPY BAKING!


Mama’s Homemade Bread

One of my most favorite things on Earth  is bread. I stopped buying processed bread in stores about 6 months ago. Store bread has additives that are not good for your body. Sugar, artificial coloring, enriched grain, Potassium Bromate, (which has been linked to cancer) high fatty oils and so much more. I decided to begin making my own and went to my mama for her favorite recipe. This recipe makes the most delicious soft white bread that is good for sandwiches or simple toast. Make this bread for a healthier alternative to store-bought bread and start being in charge of what goes into your body. Happy baking!

Ingredients:

1 Cup warm water

3 Tbsp yeast

3 1/2 Cup lukewarm water or milk

12-14 Cups Unbleached flour

6 Tbsp Sugar

2 Tbsp salt

4 1/2 Tbsp vegetable oil

Directions:

1. Dissolve yeast in 1 cup warm water. Add 3 1/2 cups lukewarm water or milk, half the amount of flour (6-7 cups), the sugar, salt and oil. Beat until smooth in mixing bowl. Mix in the rest of the four (6-7 cups) with your hands. (Will get sticky!)

2. Let the dough in the mixing bowl rest for about 10 minutes. Then dump it on the counter and Knead for 10 minutes.

3. Round up the dough and put in a large, greased bowl. Cover with a cloth for 1 hour (dough should almost double in size)

4. PUNCH IT! (My favorite part!) Then let it rise again 30 minutes.

5. Divide into 3-4 parts and shape those into loaves. Place those parts in greased bread pans. Let rise again 1 hour until sides of dough reach top of the pans.

6. BAKE for 25-30 minutes at 400 degrees. (I have found in my elevation of 4,700 feet, it is best to cook for 25 minutes at 375 degrees.) your cooking time may vary depending on where you live.

7. Remove from oven and then dump the bread out of the pans and brush all sides with butter or shortening.

**let cool before cutting or freezing**

3 loaves of bread lasts my family about 1 month. I leave one loaf out to use immediately and freeze the other two. Take some time to slow down and enjoy baking. Good luck!


Creamy Chicken Taquitos

These homemade chicken taquitos are to die for! And they’re fairly healthy, too! Overall, they take about 30 minutes to make and your family will most likely love them as much as mine does. I made them for lunch one day during the week and my husband requested them for dinner the next day! He’s a fairly picky eater so if you have a hubby like mine, he just might put these on the “make again” list.

Ingredients:

2-chicken breasts

1-8 ounce cream cheese

1/4 cup chopped cilantro

2-Tbsp lime juice

4 oz. enchilada sauce (green/red)

Seasonings:

Cumin, Chili powder, Onion powder, Garlic powder, Red pepper flakes

2 cups shredded Pepperjack cheese

12 flour tortillas

Directions:

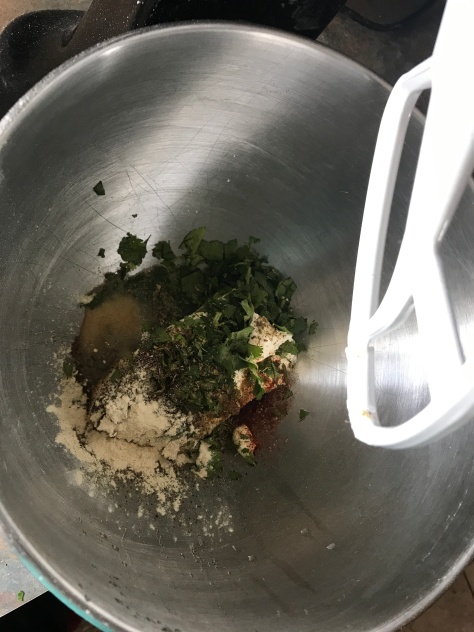
1. Melt the cream cheese just a bit then put in mixing bowl. Add the chopped cilantro, lime juice and seasonings

0F4DCE27-543D-4944-A821-BAFCF7DA7CA1.jpeg

2. Get your chicken on to boil! Put in sauce pan over high heat with water for about 20 minutes. When done, shred with a fork or two then set aside.

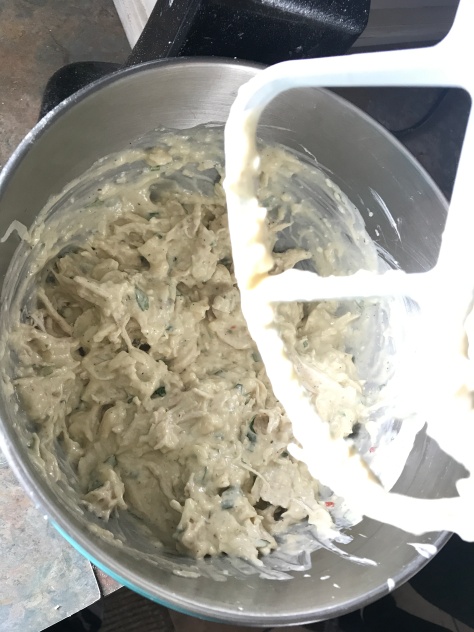
3. In the mixing bowl, add the enchilada sauce of your choosing, the cheese and, lastly, the chicken. Should look like a weird blob, but trust me it’s delicious!

2C3E8F13-7546-4CCB-BF1D-02C74C2D9589.jpeg

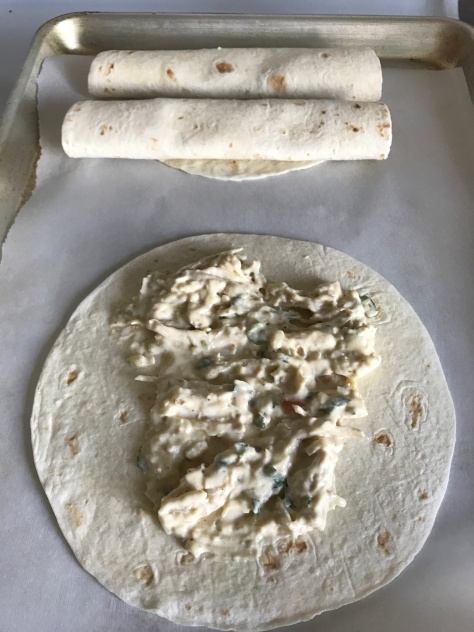
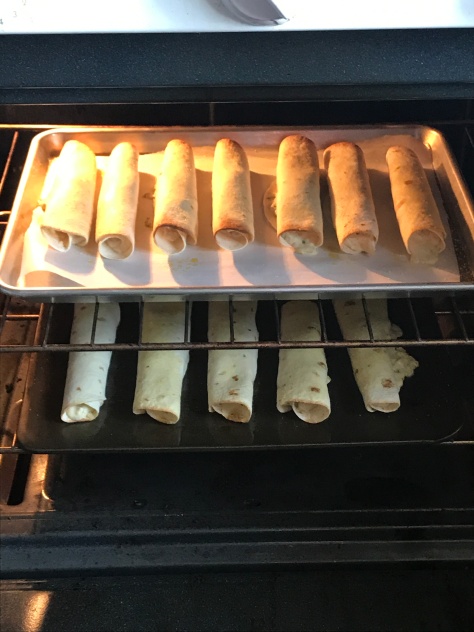
4. Lay some parchment paper on a cookie sheet to save some clean-up time. Begin to roll the chicken mixture into the tortillas. Make sure the seam side is down. Lightly spray with cooking spray and sprinkle with fine salt. Cook at 425 degrees for about 13 minutes. The edges will be a dark brown. Enjoy!!

314FBD50-1C79-499D-AD9E-24C3051D3134

Can also be frozen for future meals!

Usually makes about 12 taquitos

AAA4269D-0517-4C6A-B8EA-A130122DBBC1

Did you try this recipe?? Comment your experiences below!