All posts by kendramartin

Crunchy Wife & Mama. Passion for home design, healthy living, equine therapy and all things vintage! Thanks for visiting my little blog.

Honest Review — Contact Paper Counter tops

** THIS NOT A TUTORIAL — TUTORIAL COMING SOON **

When I first heard of contact paper being used on counter tops, I didn’t think twice about it. But then as we got closer to putting our house on the market – I started researching my options. I noticed that more and more people were using this contact paper in their kitchens. I had never heard of it so I did some reading. It seemed to be a good temporary solution to “pretty up” a space. Some people had them for 2 months and one person had them for 5 years! So I watched a bunch of how-to videos and ordered my “counter tops”.

HERE is the link to the contact paper I purchased.

I bought this specific type for the color, but also the width. There are different sizes – you just have to look around.

WHAT IS IT?

Contact paper is basically thick paper that acts like vinyl. It is smooth on one side and really sticky on the other.

PROS

Price: $38 for entire kitchen – affordable!

Forgiving: Bubbles do appear and they are annoying, but because of the pattern on the paper, they are not noticeable. Even scratches are easily hidden.

Looks GOOD: Looks like my kitchen has fancy, expensive counters!

Versatile: Several colors and patterns to choose from – goes with any style.

CONS

Time: This is a time-consuming project. Once you get more familiar with material, you move faster.

Heat Sensitive: Like any counter top, you should take care to not place hot objects directly on top. Same with contact paper.

Cutting: Again, like any counter top, use a cutting board – do not cut directly on contact paper. It cuts pretty easily. But if you use a cutting board regularly, it shouldn’t be an issue.

OVERALL

I really like our contact paper counter tops. It is a great TEMPORARY solution to make your kitchen look good. I say temporary because eventually it will have to be replaced. I did 2 coats of polycrylic to make ours more permanent and to help with sealing, but it will have to be changed out  or re-done in a couple years. I would recommend this project, but with the advice to do your research beforehand. Know that it will take some time, but it’s worth it if done properly. We have had the contact paper counter tops for about 2 months. It has held up awesomely! Small imperfections here and there, but overall it has worked great for us. Shoot me any additional messages you may have!

Easy & Tasty Pancake Syrup

Have you ever read the ingredient label on traditional Syrup from the grocery store? HOLY SUGAR! Anytime you see high fructose corn syrup it is not something you want to ingest a whole lot of. While pure maple syrup is the best form of syrup, it’s not always practical because it is expensive. This syrup recipe I’ll share with you only takes 3 minutes and only a few ingredients. NO HIGH FRUCTOSE SYRUP, NO CELLULOSE, NO PRESERVATIVES, NO OTHER JUNK. Save yourself some money and make this easy and tasty syrup!

DIRECTIONS:

  1. Whisk together 1 Cup Water, 1 Cup white sugar, 1/2 Cup brown sugar and 2 Tbsp Butter in a sauce pan.
  2. Bring to boil and cook 3 – 4 minutes, stirring frequently. DO NOT OVERCOOK
  3. Remove from heat and add in 1 Tbsp. vanilla or maple flavoring / extract.

THAT’S IT!

Notes:

Syrup will thicken as it cools.

Store in sealed jar in refrigerator.

Throw syrup in microwave if the butter hardens.


Thank you for visiting!!!

-Kendra-

Smudging Ceremony

We have some dear friends who have a Native American heritage. They recently had their baby boy blessed and they told us they were going to be giving him an “Indian name” and a blessing. I thought that was so cool! I asked if there was a way that Amelia could get a name and they said that we all could! I was so excited! What a fun tradition. Our friend’s father is or was an actual Indian Chief for several years. It’s a tradition that he has done for his family and it will be passed down to future generations as well.

What does it mean to be given a name?

The “smudging” ceremony is custom of Native American culture. It is a way to create a cleansing smoke bath that is used to purify the body, aura, energy, ceremonial/ritual space or any other space and personal articles. For us, we were surrounded by the burning sage and then given a name and a blessing of sorts. I was excited to find out the names, of course, but it was a lot more emotional than I was expecting. I might have shed some tears when it was Amelia’s turn. The chief had us spread out our arms and then he went around our arms, feet and back with the sage and a large feather. Our friend actually chose our names because he knew us and he had prayed about what names we should have.


Our names defined (as they were given)

Jason received his name first and was given: Wise Owl.

The reason our friend chose Wise Owl is because Jason is the one who watches over our family. He is the one who is going to see things before they happen. The way he goes about his decisions and life he makes sure to plan it out. He doesn’t jump to conclusions like a cat – Jason thinks things out without acting on them impulsively. He is patient. He really thinks before acting. Through the thinking process, and with his family, it is done the way Jason sees it. All things are done with patience.

I was next and received the name: Mother of Rivers.

“Rivers are steady and go one direction. They don’t change – they may branch off, but they don’t change. They are solid in what they do. You are a mother and each of your children that you have are going to branch off one day. They will go in the direction that you point them for their whole lives. It is really important that you teach them the right way. I was inspired to give you this name because rivers are really strong – they can take trees with them or anything down to get where they need to go. They will do what needs to be done.”

Amelia received the name: Little Sky.

“I knew her name was Little Sky because she’s literally a piece of Heaven for you. She’s going to be there when the clouds come and she”ll be there when they leave. The sky is what holds up the sun and the moon. It’s what holds everything together. That is what she will be for you.”

I’m so grateful and feel so blessed to have been given this unique opportunity. What a great tradition that that family let us become a part of. It’s a memory that we will cherish.

IMG_7621

IMG_7622

IMG_7627

DIY Natural Laundry Detergent

When converting our household to organic / chemical-free items, one of the first things I looked into was detergent. Mainly because both my husband and baby have sensitive skin. I have been using All Free & Clear up until recently for a couple reasons. It is Free and clear of harsh chemicals (baby approved) and it’s fairly inexpensive.

I had been trying to find a DIY detergent, but it can be overwhelming because there are so many different recipes. Sometimes the recipes have expensive ingredients or there are some that just aren’t that great. I found this recipe inspired originally by Christi at halfwaytoheavenhomestead. Check her out at https://www.instagram.com/halfwaytoheavenhomestead/ 

All of these items can be found at Walmart! The only one I had to order was the liquid Castile Soap.

This is my first week trying this detergent! I know it will be soft enough for baby’s skin, but will it be strong enough to clean cloth diapers?? I’ll let you know next week how it works!

Materials Needed:

Super Washing Soda

Baking Soda

Pure Castile Liquid Soap

Essential Oil

Ladle (for stirring and scooping)

2 Gallon Jar

Directions:

Start by pouring 1 cup of Washing Soda into your 2 gallon jar.

IMG_7593

Put just enough water in the jar to cover the washing soda.

Then add 1 cup Baking Soda.

IMG_7594IMG_7595

Completely fill the jar with water and stir. When I stirred, some of the washing soda stuck to the bottom. Using a wooden spoon to stir helped.

Add in 1 1/2 cups Pure Castile Soap.

IMG_7596

Add in 40 drops of your favorite essential oil. I used lavender because I love the smell and it’s safe for babies.

IMG_7597

Stir everything together and it’s done!

Order these cute canister labels from Kendra’s Corner Market

I use 1/2 cup per regular size load.

Also note that it is normal for the liquid to separate. Just simply stir before scooping out your detergent.

Happy crafting friends!

DIY Chicken Nesting Boxes for $15

I am so excited that we finally got our chickens and ducks! Is it officially a little farm now?? Jason wanted a cowboy hat because he’s cute and thinks he’s a farm boy now so we both got new ones. It was fun! 

Anyways, because of building the fences and coop by ourselves we were a little exhausted from DIY projects. We looked for some nesting boxes at our local ranch store and found out that one, individual box was $14.99. HOLY CRAP! So back to DIY we went. Like, it wasn’t even made that well. It was plywood. And whenever I see something overpriced I always find a way to make it myself. So I’m doing this tutorial in hopes that someone else who doesn’t want to spend $15 a nesting box can make these as well. We ended up making 12 nesting boxes for $15.

First off, we headed to Lowe’s to get the plywood. I forgot to take a pic of the one we got, but it was almost $15 and maybe 1/8 inch thick. 4 x 8 feet. And that’s it! We already had the staples but if you need them we got the 3/8 inch Crown staples for our Compressed Staple Gun. 

MATERIALS YOU WILL NEED:

4 x 8 foot Plywood sheet

Staples and staple gun

Table saw/ Miter saw

At Lowe’s, we had a guy cut the plywood for us into 12 inch x 4 foot sections. That just made it easier on us. Then we sat down and thought about how many pieces we would need to cut. We would need several 12 x 2 inch pieces for the front and back. And also the dividing pieces. My hubby did the math on these, but it wouldn’t be too hard to figure out. I like to draw it out in my head. Since we need 12 nesting boxes, that’s 36 small pieces and 10 dividing pieces.

We left 3 of the 12 inch x 4 feet sections to use as the base.

Start by cutting a few of your sheets into 12 x 12 ‘s. These are eventually going to be your dividing pieces. Then cut your 12 x 2 ‘s.

You should have a pile that looks like this.

Then take those 12 x 12 ‘s and set your saw to a 45 degree angle. Then we measured 2 inches up from the base and cut there.

Yay! The cutting is over! We measured and marked the base pieces every 12 inches apart. Then chalked to make the stapling more accurate. Line up the dividing pieces to the base pieces every 12 inches and staple down the back

.

Do this to all the dividers and bases. Then you attach the 12 x 2 ‘s to the front and back. We did a top 12 x 2 every once in a while just for extra support.

That’s it! We didn’t put end pieces on this one because it was going right up to the sides of the coop. Next is the fun part – installing it to the coop!

the bottom of these are not very strong so you will need to rest them on something. We used 2 x 10 ‘s that we had on hand. We made little tables so they had legs on the ground. Then we attached them to the wall they were next to. After that, we laid the nesting boxes on and used the nail gun to attach to the bottom support and the back wall. And look how pretty they turned out!

Just make sure it is sturdy and low enough the chickens can get on. We thought about building a walk-way, but decided against it. The chickens can jump enough to get on. These are 19 inches off the ground. Add your bedding and you’re good to go!

I hope this tutorial helps someone out! It’s an easy build that is cost effective as well. I will be doing a full coop tour once it’s all painted and pretty! Thanks for reading friends!

The BEST healthy-ISH chocolate chip cookies

You guys. I’ve done it. I’ve finally created the perfect chocolate chip cookie. And the directions are super easy! Now, it wasn’t done alone – I used tips from a few different family recipes and some trial and error.

I’m always looking for ways to sneak healthier options into my cooking and I was able to do that with these cookies!! I mean, there’s still healthier options out there for sure, but who wants that when it comes to cookies right??

I have inserted links if you’d like to see some of the exact ingredients I used.

Here it is!

INGREDIENTS:

1 Cup melted coconut oil or Butter

1 Cup brown sugar

1/2 cup organic pure cane sugar

2 tsp Vanilla Extract

1 tsp baking soda

1 1/2 tsp pink Himalayan salt

1 egg

2 1/4 cups Unbleached flour

1 1/2 cups ground oats

DIRECTIONS:

Mix all ingredients together.

Scoop with a scooper onto sheet.

Bake At 375 degrees for 7 minutes.

**HINT: the trick for getting any cookie just right is to remove it from the oven before it looks done. These cookies will turn slightly brown when you should take them out. **


HAPPY BAKING!


5 tips to get back in shape this Summer

I find myself in this vicious fitness cycle where I constantly have to start from zero. I can be solid and work out every day for 3 months and then stop for a couple weeks, get fat and then have to start over. I’m sure theres similar cases with a lot of people. It’s been hard to stay in shape (with it being Winter and all) but now it is Spring! I went on a run this morning (well half – run, getting in shape remember??) and I was thinking about what I need to do to keep going. I love getting outside because that is time for ME. These are the things that would be a good guide to start doing.


1. Eat right.

80% of losing weight is eating right. Exercise is 20%. Be aware of what you are putting into your body. No fast food, no soda, and eat those veggies! Up the protein when exercising as that maintains and repairs body tissues.

2. Start slow and set REALISTIC goals for yourself.

It is healthy to lose 1-2 pounds a week. Don’t think you have to lose 15 in a day. For example, my workout schedule Consists of running 1 mile every other day with strength training / Pilates in between. Eventually I’ll up it to 2 miles, then 3 then 4 and so on. Have a goal to at least walk 30 minutes every day.

3. Make it a habit.

Don’t get lazy!! This can be hard to overcome, but just think of how good it will feel once it’s done.

4. Exercise in the morning, if possible.

Getting some exercise at any time during the day is great!! But for myself, personally, I am better at sticking to my goals if I get it done in the AM.

5. Don’t reward yourself with sugar.

Ahhh I can’t say this enough. You can still reward yourself! Just do it with other things. Maybe you get a new T-shirt or set aside some reading time as reward for hitting those goals. Make your spouse give you a well- deserved foot massage.


These are the tips that I think would best fit my needs to stay in shape. I hope they help you as well! Have fun and ENJOY getting outside and doing something for yourself.

Colloidal Silver —How, What & Why

Colloidal Silver. How it works, what it is and why you should have it.

If you’re a wanna-be homeopath like me, you will definitely want some Colloidal Silver in your medicine cabinet. It’s pretty much the coolest thing that heals so many things! One of the World’s wonders for sure. It is a potent anti-fungal and anti-bacterial solution. Because it is considered more of a “homeopathic” remedy, in 1991 the FDA warned against it (just like most natural remedies) but if used correctly, should be perfectly safe. (It is difficult to overdose – unless ingesting a TON)

How It Works

“The presence of colloidal silver near a virus, fungus, bacterium or any other single celled pathogen disables its oxygen metabolism enzyme, its chemical lung, so to say. Within a few minutes, the pathogen suffocates and dies, and is cleared out of the body by the immune, lymphatic and elimination systems.

Unlike pharmaceutical antibiotics, which destroy beneficial enzymes, colloidal silver leaves these tissue-cell enzymes intact, as they are radically different from the enzymes of primitive single-celled life. Thus colloidal silver is absolutely safe for humans, reptiles, plants and all multi-celled living matter.”

A Little History

“Prior to 1938, colloidal silver was used by physicians as a mainstream antibiotic treatment and was considered quite “high-tech.” Production methods, however, were costly. The pharmaceutical industry moved in, causing colloidal research to be set aside in favor of fast working and financially lucrative drugs.”

http://altered-states.net/barry/update93/

Since 1938, however, Silver Colloid has been tested and tried numerous times and has been proven to be benefical and a true remedy that works.

How and Where to Use

Eye Infections — Two drops in the eye 3-4 times a day.

Ear Infections — 8 drops in the ear, leave in for two minutes then tip out. Repeat 3 times per day.

Nasal Infections — 1-2 drops in each nostril up to 3 times a day

Mouth and Gum Infections — hold 1-2 teaspoons silver under tongue for 3 minutes, then swallow. 3 times per day.

Nail Fungus — drop silver on area several times a day. Depending on severity, could be healed in a couple days or weeks.

Foot Odor — Spray feet well morning and night.

Cold & Flu — hold 1-2 teaspoons under tongue for 30 seconds, then swallow. Repeat every 1-2 hours.

Sore Throat & Step — Gargle 1 Tablespoon for 2 minutes. Spit out. Repeat 5 times per day.

Topically (cuts, scrapes, burns, etc) — Spray directly on area 5-10 times. Repeat 4-5 times a day.

Food Poisoning or Dystentry — swallow 1 Tablespoon directly every hour. Take on empty stomach.

Urinary Tract Infection — same as food poisoning.

Respiratory Infection — place 1 teaspoon in a nebulizer and inhale for 10 minutes. Repeat 3 times a day.

Diarrhea — swallow 1 teaspoon 3-7 times per day.

Water Purification — Apply 1 Tablespoon per gallon of water, shake and wait 6 minutes.

Underarm Deodarant — apply 1 Tablespoon to each underarm.

Pets — Drop 1 teaspoon into drinking water, spray onto dry skin or on a wound.

Gardening — Add 1 Tablespoon to spray bottle.

Acne — In addition to omitting sugars, fats and chocolate from the diet, any person with acne should wash and rinse the face thoroughly four times a day; and after each rinsing, use a small amount of Colloidal Silver and massage it onto the problem areas two to three times with a finger or a tiny piece of cotton or tissue.

Diaper Rash — spray directly onto body and once onto diaper.

Allergic Reactions —spray directly onto area and hives will disappear within 15 minutes.

Can be added to cleaning supplies, spray on fruits and veggies before storing, the list goes on and on.

Here are some more diseases Colloidal Silver has been used against just in case those weren’t enough…

AIDS, allergies, appendicitis, arthritis and athletes foot, bladder infection, blood parasites, blood poisoning, boils, bubonic plagues and burns; cancer, candida, canine parvovirus, chilblains, cholera, colitis, conjunctivitis and cystitis; dandruff dermatitis, diabetes and dysentery; eczema and encephalitis; fibrositis; gastritis and gonorrhea; hayfever and herpes; impetigo and indigestion; keratitis, leprosy, leukemia, lupus, lymphangitis and lyme disease; malaria and meningitis. Also, neurasthenia; parasitic infection, pleurisy, pneumonia, prostate infection. pruritis ani, psoriasis and purulent ophtalmia; rheumatism, rhinitis and ringworm; scarlet fever, septic conditions (eyes ears,mouth and throat), seborrhea, septicemia, shingles, staph and strep infections, stomach flu and syphilis; thrush (yeast infection), thyroid infections, tonsillitis, toxemia, trachoma, trench foot and tuberculosis; ulcerated stomach; virus (all forms) ; warts and whooping cough and yeast infection (females).

http://altered-states.net/barry/update93/uses.htm

https://www.needs.com/product/HWC06-ISH-04/l_Colloidal_Silver


Well, that about wraps it up! I am continually learning more about this miracle liquid and I can honestly say that it works! My family has been using it for the past year and all illnesses we have are gone quickly if Silver Colloid is involved. My father-in-law makes his own and that is where we got our stash. I will hopefully get a recipe soon and add that here to share. But it is available to buy online or in most Natural or Herbal stores. Hope this helps anyone who was curious about the product or looking for new ways to cure ails from home.


Our Dryer is Alive!

Okay guys. Let’s talk the laundry room. This has been a frustrating topic for both Jason and I since we moved into our house over a year ago. If any of you have been following about how wacky our house is, this should come as no surprise. When we moved in, we expected there to be a working washer and dryer because the sellers said there was! We inherited 4 washers and 3 dryers when we got this house. 2 were inside the house and the rest of those appliances were in the backyard in various areas. We quickly took the excess washers and dryers to a local recycling company and were done with them. Then we found out the wiring was all wrong. The pipes were out of date and there was no power going to the washer. One day we were leaving for a trip and heard something coming from the laundry room. We open the door and there’s a waterfall coming from the wall! Turns out a pipe burst so we had to fix that before we could leave. Hubby ran some new wires from the ceiling. An electrician friend of ours came out and set up a new breaker box for us. A few more touch ups and a whole year and a half later, we have a working washer and dryer!!

Laundry is the worst chore in the whole world. Or at least I used to think so. Maybe God gave me this trial so that I would be more appreciative when it came to washing clothes. Because I am so excited about it now! I did my first load of laundry today and loved that I could do it.

My plan now is to make that room as cute as I can possibly make it. Maybe it will make it even easier to do laundry if I have a room that is nice to be in. I’ve been obsessing over all the pretty laundry rooms on Pinterest. I know that mine won’t be as nice as those, but maybe I can create a place that I’m happy with. Overall I’m just so grateful for the gift of washing machines and dryers! What a great thing that gets overlooked a lot.

I’ve been trying to find the perfect color to brighten the room up a bit. Something that is pretty, not too crazy and won’t negatively effect the resale. I plan on making a countertop and shelves for the hampers. Maybe a little locker area, too. I’m trying to choose between these three.

Sherwin Williams — Silvermist

AA632C8E-781D-4524-BBEC-C5972D4083B0
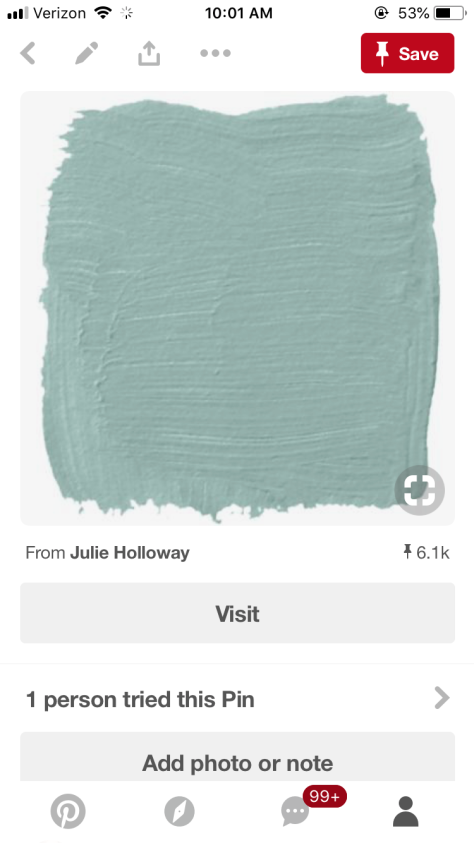
Sherwin Williams —Hazel

369A8926-C0F1-4A89-B94D-0B3140E0B1CF

Sherwin Williams — Rainwashed 

43E76B16-F9FB-4639-9930-678F317F4671

So which color is your favorite?? We will be putting in some oak cabinets and I’m thinking of painting and stenciling the floor as well. Thanks for following along in our journey! I’m so excited to show you guys the final reveal!

Before pic of our messy room

2FCD3EEB-B8E5-408E-8B5C-A842F930A0CB

Mama’s Homemade Bread

One of my most favorite things on Earth  is bread. I stopped buying processed bread in stores about 6 months ago. Store bread has additives that are not good for your body. Sugar, artificial coloring, enriched grain, Potassium Bromate, (which has been linked to cancer) high fatty oils and so much more. I decided to begin making my own and went to my mama for her favorite recipe. This recipe makes the most delicious soft white bread that is good for sandwiches or simple toast. Make this bread for a healthier alternative to store-bought bread and start being in charge of what goes into your body. Happy baking!

Ingredients:

1 Cup warm water

3 Tbsp yeast

3 1/2 Cup lukewarm water or milk

12-14 Cups Unbleached flour

6 Tbsp Sugar

2 Tbsp salt

4 1/2 Tbsp vegetable oil

Directions:

1. Dissolve yeast in 1 cup warm water. Add 3 1/2 cups lukewarm water or milk, half the amount of flour (6-7 cups), the sugar, salt and oil. Beat until smooth in mixing bowl. Mix in the rest of the four (6-7 cups) with your hands. (Will get sticky!)

2. Let the dough in the mixing bowl rest for about 10 minutes. Then dump it on the counter and Knead for 10 minutes.

3. Round up the dough and put in a large, greased bowl. Cover with a cloth for 1 hour (dough should almost double in size)

4. PUNCH IT! (My favorite part!) Then let it rise again 30 minutes.

5. Divide into 3-4 parts and shape those into loaves. Place those parts in greased bread pans. Let rise again 1 hour until sides of dough reach top of the pans.

6. BAKE for 25-30 minutes at 400 degrees. (I have found in my elevation of 4,700 feet, it is best to cook for 25 minutes at 375 degrees.) your cooking time may vary depending on where you live.

7. Remove from oven and then dump the bread out of the pans and brush all sides with butter or shortening.

**let cool before cutting or freezing**

3 loaves of bread lasts my family about 1 month. I leave one loaf out to use immediately and freeze the other two. Take some time to slow down and enjoy baking. Good luck!